AI Avatars 101
On this page you will learn how to create custom styled avatars with AI.
The avatar creation involves two main phases
- Training a custom model
- Creating avatars from the custom model
Let's authorize for demo use
Important prerequisite
For access to the AI Avatar service you need to contact our support or sales team first.
Well, before we start, let's make sure our requests on the site is authorized. You should already have an API Key provided by your account manager or sales rep. Paste the provided key in this field on the right side.
Training a custom AI Avatar model
To train a model you need to make two calls. The first one is to initiate the training and the second one is to get the status and verify the model is ready to use.
Here is how you can train a model on this documentation site. First you need to get to the Create Avatar Model API.
As you get to the page, you need to add two parameters. The first one is about adding reference photos. There is a requirement to upload at least 5 reference images and only maximum of 30 are allowed. It's required to use either JPG (recommended) or PNG images, as well as for the best performance all files are recommended to be downsized to 512x512 pixels.
Click on the plus icon to add more URLs to your reference images.
For best results, we recommend to use selfies from different angles.
It is important that the provided URLs are publicly available for at least 30 minutes so that our services can fetch it and run the training.
The next step is about defining what type of avatars you want to create. As you can see above and in the documentation, you can train avatar models for man, woman, couple, dog, and a cat.
You should click and change the type parameter and make sure on the right side the generated code confirms that the type parameter is added.
At this moment your code on the right side should look like this
and you should be ready to click on the "Try It!" button and initiate the request to train the custom avatar model.
If the request is successful, you will get this type of a response.
Ok, cool, now that the request is submitted, you should wait up to 20 minutes for the training to finish. Make sure to collect the value provided in this response as "model_id" (in the example above it's aae674a1-ae60-...).
Let's now see how you verify the status of the training in 5 minutes. Let's get to the second endpoint to check the status of model training.
If you see this, then you are on the right page. Let's scroll to see where we can type in the "model_id".
Good, now what is left to click on the "Try It!" button on the right side to initiate the call. If the model training is finished you will get a response like this with the status as "DONE". Otherwise the status will show the current progress.
Now we are ready to generate avatars!
Creating avatars from the custom model
Now that you are familiar how to operate on our documentation and demo site. It should be much easier get here and create the avatars.
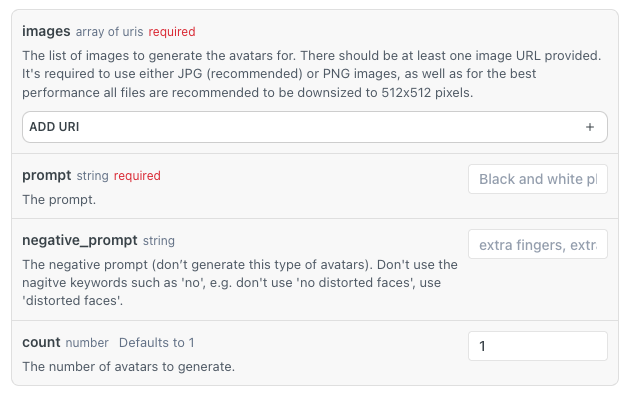
Now we should add the "model_id" we already confirmed is ready to use, as well as we should add prompts. Click on the plus buttons to add more avatar requests. Each object definition allows to generate 1+ avatars in a given style. During this demo you can use the style named "realistic". For more styles, contact to your account success manager or the sales rep.
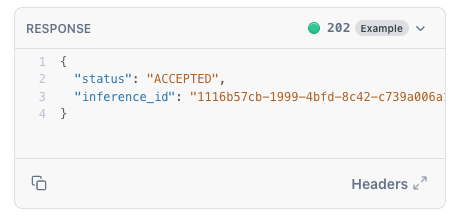
As you specify the prompt, now you are ready to click on "Try It!" and initiate the avatar creation. This will take some time, but you will now get this response where you should collect the provided "inference_id". This will be used in the next step.
We are about to get access to the avatars. Let's get to the page where we can check the status of avatar creation.
On this page you need to add the already known "model_id" and the "inference_id". Then click on the "Try It!" to initiate the call.
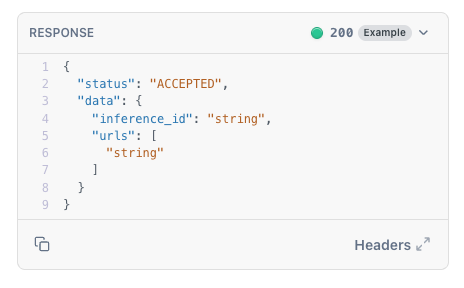
When the avatars are ready, you will get this type of a response.
Here each generated avatar is provided with a URL that will be available during 48 hours for download.
Congratulations, now you have tried and tested the full cycle of AI Avatar creation.
For developers
Some important notes for developers
- As you can see, the all services and endpoints are stateless and anonymous. Picsart doesn't know for which end user the training is done. You will need to manage the state in your software and infra.
- Provided source URLs do get deleted as the model gets trained. There is no need to initiate a "delete" call.
- Picsart doesn't keep a log for the models that are trained and keeps no info which model is trained by what image URLs. This makes the storage of the "model_id" quite critical. If the value is lost, the trained model will be lost.
- Result avatars do get deleted in 2 days. If those are not retrieved and saved, those images will automatically be deleted from Picsart's infrastructure.
- Source images are recommended to be JPG that are downsized to 512x512 pixels.
Updated about 2 months ago